Preparing a Wall for Tiling: A Complete Guide to Proper Preparation and the Role of a Notched Trowel
November 22, 2024
Tiling is an excellent way to enhance the appearance and functionality of a space. However, achieving professional results requires proper wall preparation and the right tools. A well-prepared wall ensures long-lasting tiles, while a notched trowel ensures secure adhesion and alignment. Here’s a step-by-step guide to help you prepare a wall for tiling and understand why the notched trowel is indispensable.
Step 1: Assess the Wall Condition
Before tiling, evaluate the wall to ensure it is stable and ready:
- Stability: Ensure there is no loose plaster, paint, or wallpaper.
- Flatness: Check for uneven surfaces or bumps that may affect tile alignment.
Tip: Use a straightedge or level to identify uneven spots. Repair any imperfections to create a smooth surface.
Step 2: Clean the Wall
A clean surface is crucial for proper adhesive bonding. Follow these steps:
- Remove Dust and Debris: Use a brush, cloth, or vacuum.
- Eliminate Grease and Oil: Clean the surface with mild detergent and water.
- Rinse and Dry: Ensure the wall is dry to prevent moisture interference with the adhesive.
SEO Focus: Cleaning ensures maximum adhesive performance, a key factor in durable tiling.
Step 3: Repair and Level the Wall
For smooth tile application, repair cracks and ensure a level surface:
- Fill Holes and Cracks: Use filler or spackling paste. Once dried, sand the area for smoothness.
- Apply Primer: Use a primer suited for tiling to seal absorbent surfaces like drywall or plaster.
Expert Advice: Priming helps the adhesive bond better, especially on porous surfaces.
Step 4: Mark Guidelines for Tiling
Guidelines ensure precise tile placement:
- Draw Horizontal Lines: Use a level to mark the base for your first row.
- Add Grid Lines: Mark vertical and horizontal grids for accurate spacing.
Pro Tip: Double-check the alignment of your lines to avoid uneven tiling.
The Essential Role of a Notched Trowel in Tiling
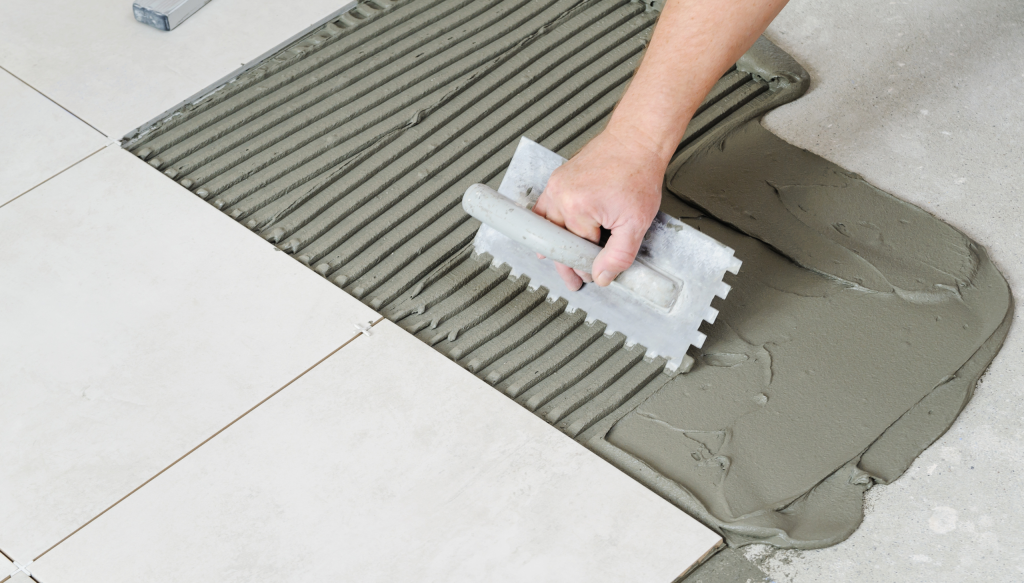
A notched trowel is a specialized tool that plays a vital role in tile installation. Here’s why it’s a must-have:
- Even Adhesive Distribution
- The notches create ridges in the adhesive that ensure consistent coverage when tiles are pressed down, eliminating air pockets.
- Improved Tile Bonding
- Ridges from the trowel allow maximum contact between the tile and adhesive, ensuring a secure bond even in high-moisture areas.
- Ensures Alignment
- Uniform adhesive layers help tiles sit flush with each other, resulting in a smooth, professional finish.
Pro Tip: A notched trowel is key for precision, durability, and adhesion, making it indispensable for tiling success.
Choosing the Right-Notched Trowel
Not all trowels are created equal. Select the right one based on tile size:
- Small Tiles (up to 4 inches): Use a ¼-inch notched trowel.
- Medium Tiles (4-12 inches): Opt for a ⅜-inch trowel.
- Large Tiles (over 12 inches): A ½-inch trowel provides better adhesive coverage.
Quick Tip: Using the wrong size trowel may lead to insufficient bonding or uneven tiles.
Conclusion: Setting the Foundation for Tiling Success
Proper wall preparation and the use of a notched trowel are the backbone of a successful tiling project. By following these steps and selecting the right tools, you ensure your tiles are durable, perfectly aligned, and visually stunning. With a smooth surface and even adhesive application, your tiling project is sure to stand the test of time.
Ready to start tiling? Check out our range of high-quality primers, adhesives, and notched trowels to make your project a success!
